Guida in italiano qua!
Cliccate su Leggi Tutto per la guida completa in inglese!
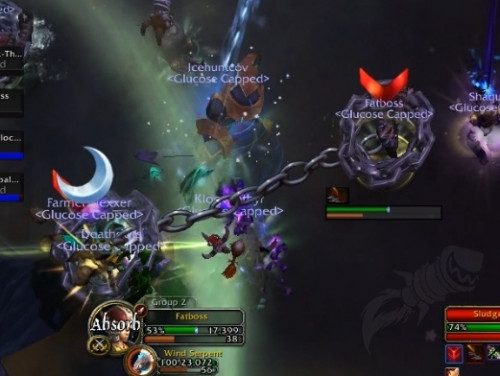
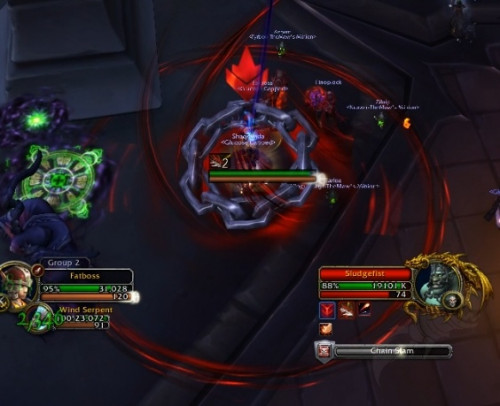
Sludgefist Quick Tips in Castle Nathria
-
Stay within 15 yards of your partner at all times when afflicted with
 Chain Link.
 -
Both tanks should stand on each other at all times to share the damage from
 Giant Fists.
 -
When marked by
 Hateful Gaze, hide behind a pillar to make the boss run into it. Everyone else should avoid standing in this path!
 -
Align DPS cooldowns to take advantage of the
 Destructive Impact damage increase the boss has whilst stunned after hitting a pillar.
 -
Position the boss 20+ yards away from pillars at all times to avoid breaking them with
 Destructive Stomp.
 -
Run 20+ yards away from the boss when he casts Destructive Stomp.
-
Ranged players should stay far from the boss to bait
 Falling Rubble into low traffic areas.
 -
 Colossal Roar deals damage and pushes you back... avoid getting pushed back into
  Stonequake zones!
 -
The boss gains a
 Gruesome Rage at low health... finish him off quickly!
Sludgefist Abilities & Strategy
Chain Link
Sludgefist will frequently mark two players with ![]() Chain Link.
Chain Link.
-
These players will be marked with a red arrow above their heads, allowing them to find their partner in a crowd.
-
After 6 seconds these players will be linked together for 54 seconds. During this time they will be taking very minor physical damage every 2 seconds.
-
If these players move 15 yards apart, the chain will break and
 Shattering Chain is triggered, dealing lethal physical damage to both players whilst stunning them for 6 seconds.
 -
The players must stay within 15 yards of each other until the debuff drops, ideally staying as close as possible to avoid accidentally moving too far apart when dodging certain abilities.
It is possible for both players to survive a ![]() Shattering Chain if they both use large damage reduction abilities.
Shattering Chain if they both use large damage reduction abilities.
-
This isn't necessary and is arguably a bad idea as they will lose 6 seconds of uptime due to the stun.
-
The damage from Shattering Chain pierces through immunity spells, such as
 Blessing of Protection.
Giant Fists
The boss has the ![]() Giant Fists passive, causing each melee attack to also strike the next closest player within 5 yards of the primary target.
Giant Fists passive, causing each melee attack to also strike the next closest player within 5 yards of the primary target.
-
If no extra target is found, the boss will instead hit the tank with two melee hits.
-
The two tanks should remain stacked up at all times as to spread the damage between them.
-
Melee players should keep their distance from the tanks as to ensure they do not accidentally get hit by one of these attacks which deal heavy damage.
-
Healers need make sure that they are keeping both tanks healthy throughout the fight.
-
As a result of this passive, tanks will only ever been chained together if targeted by Chain Link.
Hateful Gaze
The boss gains energy over time. Upon reaching 100 energy, he will mark the tank with ![]() Hateful Gaze.
Hateful Gaze.
-
6 seconds later, the boss will charge in the direction the tank is currently located. This
 Heedless Charge will deal lethal physical damage to any players in his path.
 -
Sludgefist will continue to charge in this direction until he hits terrain, causing a Destructive Impact which deals moderate raid damage whilst stunning him for 12 seconds. The boss takes 100% more damage during the stun.
-
DPS should look to align DPS cooldowns during this stun, as to benefit from the 100% damage taken increase the boss has.
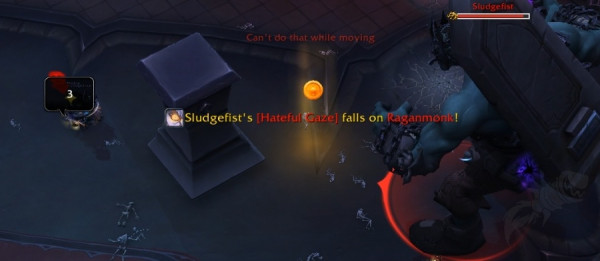
Force Sludgefist to charge into a pillar - not the wall!
Additional effects will occur depending on the terrain the boss charges into.
-
If he hits a wall, he will trigger
 Collapsing Foundation, dealing heavy physical damage to the raid every second until the end of the encounter.
 -
If he hits a pillar, he will trigger
 Crumbling Foundation, dealing very low physical damage to the raid every second until the end of the encounter. This can stack.
 -
The raid wants to avoid triggering Collapsing Foundation by ensuring that Sludgefist always charges into a pillar.
As soon as the tank is marked, they should position themselves so that a pillar is between themselves and the boss.
-
When the boss charges at the tank, Sludgefist will instead slam right into the pillar, destroying it.
-
As there are only 4 pillars in the encounter space, the raid needs to kill Sludgefist before he casts Hateful Gaze for a 5th time, otherwise Collapsing Foundation will trigger and the raid will wipe very quickly.
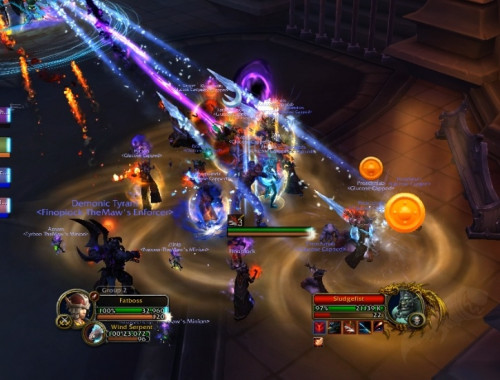
Destructive Stomp
-
After a 4 second cast, the boss will deal high physical damage to all players within 20 yards and knock them back.
-
Players within melee range simply need to move away from the boss to avoid this ability.
-
Chain Link pairs within melee should move away from the boss in the same direction as to avoid breaking their chains.
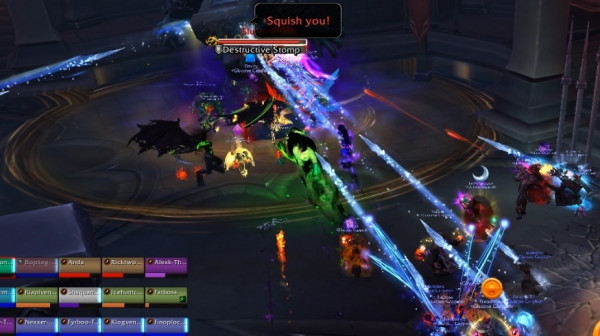
This ability also destroys any pillars within the radius.
-
The tanks need to ensure that the boss is always kept at least 20+ yards away from pillars as to make sure that no pillars go to waste.
-
At the beginning of the fight, when all pillars are intact, the boss should be tanked at the top of the encounter space where he spawns.
-
After each Hateful Gaze, the boss will need to be repositioned to a free space nearby to make sure that he is away from the other pillars.
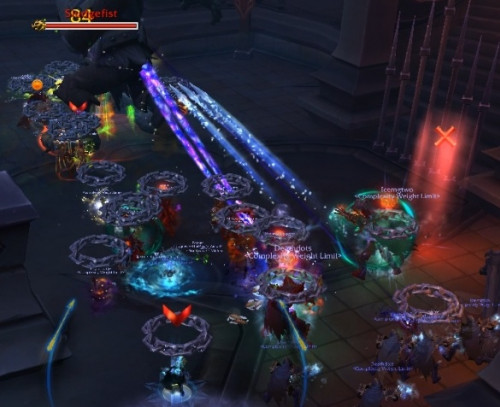
Falling Rubble
The boss will frequently trigger ![]() Falling Rubble, marking the location underneath random ranged players.
Falling Rubble, marking the location underneath random ranged players.
-
Moments later, debris falls at that location dealing moderate physical damage to all players within 6 yards whilst stunning them for 6 seconds.
-
This also leaves behind a permanent Stonequake zone at the impact location, which deals damage and reduces movement speeds by 25% for anyone who stands within them.
Ranged players should attempt to bait these ![]() Falling Rubble zones towards the edges of the room, as to keep the play-space clear.
Falling Rubble zones towards the edges of the room, as to keep the play-space clear.
-
It is also ideal if all ranged players stay at least 30 yards away from the boss, as to make sure melee players will have a clear space to run to when avoiding Destructive Stomp.
-
Ranged Chain Link pairs should attempt to dodge these zones by travelling in the same direction as to avoid snapping their chain.
-
A good idea for Chain Link pairs is to also move just outside of the landing location, as that way the players will still be within Chain Link distance of each other even if they travel in slightly different directions.
At the beginning of the fight, ranged players should position loosely on one side of the room as to keep these locations together whilst being within healing range.
-
After each Hateful Gaze, ranged players can readjust their position to keep within range of the boss.
-
Just make sure that you do not stand in locations that the tanks will need to traverse when targeted by Hateful Gaze.
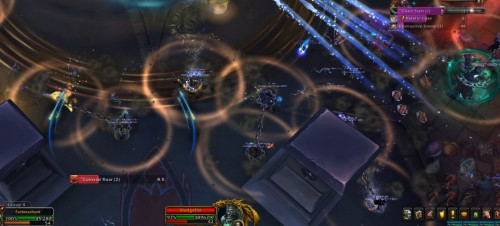
Colossal Roar
At the beginning of the fight and every ~30 seconds after that point, the boss will cast ![]() Colossal Roar.
Colossal Roar.
-
This deals unavoidable damage to the raid whilst pushing them away from the boss.
-
This acts as more of an inconvenience rather than a major threat, but players should position themselves so that they are not pushed into Stonequake marked areas.
-
Chain Link pairs should try and stand directly next to one another as to avoid being spread too far apart from each other when this is cast.
-
This does not interrupt spell casting as long as you do not actively move your character during the spell.
Gruesome Rage
The boss gains ![]() Gruesome Rage upon reaching 20% health, increasing his attack speed and damage dealt by 20%.
Gruesome Rage upon reaching 20% health, increasing his attack speed and damage dealt by 20%.
-
Healers and tanks need to be ready to deal with this extra incoming damage by using defensive and healing-output cooldowns to counteract it.
-
Although we do not feel that
 Bloodlust should be used at this point to push through this soft-enrage more quickly, raid teams who are really struggling with this excess damage may benefit from it.
Heroic Sludgefist in Castle Nathria
 Chain Slam
Approximately once per minute, the boss will cast ![]() Chain Slam targeted at a random (usually ranged) player.
Chain Slam targeted at a random (usually ranged) player.
-
This will immobilize them and after 4 seconds the boss will drag that player and anyone within 7 yards of them into melee range of the boss.
-
Sludgefist then immediately deals a near lethal burst of physical damage split between all players dragged in towards him.
To counter this mechanic, simply have 2-3 players stand within 7 yards of the ![]() Chain Slam target to help split the damage.
Chain Slam target to help split the damage.
-
After the damage has gone out, these players should move back away from the boss to avoid spawning Falling Rubble zones in melee.
-
On Heroic, a player is able to solo-soak this ability if they use a large damage reduction or physical damage immunity.
-
If you are in a Chain Link pair, it is best to avoid participating in this mechanic as you will break your chain if you are dragged into the boss and your partner is not.
-
If both Chain Link players are dragged towards the boss, the chain will not break between them.
Chain Link
This ability is cast more often, meaning that there will be more members of the raid paired up with ![]() Chain Link at any given time.
Chain Link at any given time.
-
Additionally, the distance Chain Link pairs can move away from one another without triggering a Shattering Chain is reduced to 12 yards, down from 15.
-
This reduction makes the fight more difficult, especially for ranged players who are dodging Falling Rubble as they now need to move in roughly the same direction to avoid shattering their chain.
Mythic Sludgefist in Castle Nathria
Chain Link
On mythic difficulty, the ![]() Chain Link is applied to all twenty players at the same time. This is done at the beginning of the fight and after each
Chain Link is applied to all twenty players at the same time. This is done at the beginning of the fight and after each ![]() Hateful Gaze charge.
Hateful Gaze charge.
-
Players have a short period of time to find their partner and then stand with them for the 1 minute duration.
-
When making pairs, the two tanks are chained together and the game tries to pair melee players with other melee and ranged with other ranged.
-
If there is uneven numbers within these groups, you can sometimes have a melee player chained with a ranged player.
-
In these situations, the ranged player should follow the melee player around so that the melee player can damage the boss.
Find the other player with the arrow above their head as this is your partner!
The distance ![]() Chain Link pairs can move away from one another without triggering a
Chain Link pairs can move away from one another without triggering a ![]() Shattering Chain is reduced to 10 yards, down from 12.
Shattering Chain is reduced to 10 yards, down from 12.
-
Players need to be extra careful when moving around as to ensure that they do not accidentally break their chain with this reduction.
 Seismic Shift
Sludgefist will frequently apply ![]() Seismic Shift to all raid members.
Seismic Shift to all raid members.
-
This is a 4 second debuff that deals moderate physical damage to all players within 4 yards once it expires.
-
When this is applied, all players should spread apart from one another to avoid splashing damage on to each other, whilst remaining within 10 yards of their Chain Link partner.
-
Once the debuffs have expired, players should then restack back on their partner as to reduce the chance of an accidental Shattering Chain.
-
To make spreading out easier to achieve, the raid should already be loosely spread. This also helps reduce the chance that you'll need to move from a Falling Rubble location.
This ability is occasionally cast just as the ![]() Chain Link Link pairs have been marked, but the chains haven't formed yet.
Chain Link Link pairs have been marked, but the chains haven't formed yet.
-
During this window players should look to find their partner and then stand as close as they can without splashing damage on each other.
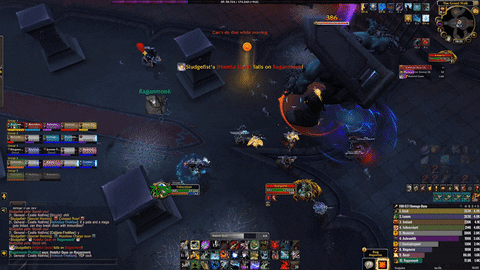
Chain Slam
On Mythic difficulty, if less than four players are hit by the ![]() Chain Slam the boss will gain (Spell #341294), increasing damage dealt by 100% and increasing the boss's attack speed by 60%.
Chain Slam the boss will gain (Spell #341294), increasing damage dealt by 100% and increasing the boss's attack speed by 60%.
-
The Chain Slam also applies
 Chain Bleed on all players hit, dealing moderate physical damage every 2 seconds over 12 seconds. This is a bleed effect and can be removed by abilities that remove bleeds.
 -
To counter these changes, simply have the initial target be accompanied by their Chain Link partner and one other nearby Chain Link pair.
-
Healers will need to make sure these players are healthy for the initial hit and are kept topped up whilst the Chain Bleed is active on them.
 Fractured Boulder
Upon charging into a pillar via ![]() Hateful Gaze, the pillar spawns 4
Hateful Gaze, the pillar spawns 4 ![]() Fractured Boulder impact locations, one in front of each flat facing side of the destroyed pillar.
Fractured Boulder impact locations, one in front of each flat facing side of the destroyed pillar.
-
Each Fractured Boulder then splits into two
 Fractured Debris zones which deal low physical damage to all players within 3 yards.
 -
If any Fractured Boulder/ Fractured Debris fails to hit at least 1 player,
 Fractured Impact is triggered which deals very high physical damage to all players.
Make sure that both waves of zones are soaked!
This ability resolves very quickly, leaving little time to react.
-
To make it easier, the majority of the raid should position themselves near the pillar that is going to be hit.
-
This will reduce the distance players need to travel to reach a Fractured Boulder/ Fractured Debris zone and soak it.
-
Players will still be afflicted with Chain Link during this time.