Sire Denathrius
Guida in italiano qua!
Cliccate su Leggi Tutto per la guida completa in inglese!
Sire Denathrius Quick Tips in Castle Nathria
Phase One: 100% - 70% Health
-
Move away from others when marked with
 Feeding Time.
 -
Move from the
 Ravage cone and don't stand in the
  Desolation pool it leaves behind.
 -
Divide the raid into two even teams. These teams take turns at standing in the
 Cleansing Pain cast.
 -
Kill the Echo of Sin adds as soon as possible.
-
Make sure you have less than 3 stacks of
 Burden of Sin when the intermission begins.
 -
Run to the middle of the room to survive the
 March of the Penitent intermission.
Phase Two: 70% - 40% Health
-
Kill the Crimson Cabalist adds as a high priority.
-
Position the Wracking Pain to hit the adds and not the raid.
-
Taunt off of one another after each Wracking Pain cast.
-
Position the Remornia add near the boss to allow DPS to cleave damage onto it.
-
Place the boss near the mirror for the
 Hand of Destruction. Run through the mirror when the ability begins!
 -
Move away from others when marked for
 Impale. Other players need to dodge the path it takes as the sword charges around.
 -
Dodge the large
 Massacre sword lines!
Phase Three: 40% - 0% Health
-
Kill any remaining Crimson Cabalist adds as soon as possible.
-
Stand around the middle of the encounter space to avoid the
 Indignation goo.
 -
Position the boss towards the edges so that players are knocked into the middle when
 Shattering Pain is cast.
 -
Move away from others when afflicted with
 Fatal Finesse.
Sire Denathrius Abilities & Strategy
Beta Test Note: This boss was only tested once on heroic difficulty and not on any other difficulty. Therefore the information provided in the guide is based on the heroic version of the encounter, datamining, and the in-game dungeon journal. This guide will be updated when this boss is encountered on live servers.
Sire Denathrius Phase One: 100% - 70%
 Inevitable
Denathrius has the ![]() Inevitable passive. This forces the boss to teleport to the current tank if he is not within melee range of the boss.
Inevitable passive. This forces the boss to teleport to the current tank if he is not within melee range of the boss.
-
This is actually a beneficial passive for the raid, as the boss needs to frequently traverse large distances which would normally lead to large melee downtime.
-
Inevitable is unlikely to be noticed much during Phase One, but it is very noticeable during phases two and three.
-
Upon teleporting, the boss will hit the tank for 50% of his weapon damage, so tanks shouldn't attempt to force the boss to teleport all the time.
Feeding Time
The boss will occasionally mark 2 players with ![]() Feeding Time.
Feeding Time.
-
5 seconds later, the marked players and anyone within 4 yards of them will take a moderate burst of physical damage.
-
The boss will be healed for 150% of the damage done by the Feeding Time ability.
-
To reduce both incoming raid damage and the amount the boss heals, the marked players simply need to move 4+ yards away from any other player.
 Command: Ravage
Denathrius has an energy bar that passively fills over time. Upon reaching 100% energy, he will cast ![]() Command: Ravage.
Command: Ravage.
-
A blade in the centre of the encounter space will then mark the location of the boss with a large frontal cone which covers 1 third of the encounter space.
-
After a 6 second cast, Ravage goes through dealing very high damage to all players in the area. This also coats the area with permanent Desolation pools.
-
Standing in Desolation deals high shadow damage every second and reduces incoming healing by 100%.
-
Players need to move quickly away from this marked location, but they should move as a group as to keep within range of the boss and each other.
-
Before the pull, the raid should agree upon a direction the boss will be dragged for each Ravage cast as to allow players to prepare for the movement.
Each ![]() Ravage cast from this point will coat another third of the room. This third of the room will be centered as close to the boss as possible, but will not overlap with the previous
Ravage cast from this point will coat another third of the room. This third of the room will be centered as close to the boss as possible, but will not overlap with the previous
![]() Desolation pools.
Desolation pools.
-
As the Desolation pools are permanent, the raid needs to damage Denathrius down to 70% before the third Ravage cast completes because at that point there will be no space left.
-
Additionally, Ravage grants the boss a stack of
 Commanding Presence, which increases his damage done by 10% for the rest of the phase.
 -
Healers simply need to be aware that incoming damage will be increasing over the course of the phase.
Burden of Sin
At the beginning of the encounter, all players receive 4 stacks of the ![]() Burden of Sin debuff.
Burden of Sin debuff.
-
This debuff deals low shadow damage per stack and lasts until Phase Two.
-
Although that's all the debuff does in isolation, it interacts with
 Blood Price, Cleansing Pain Phase One abilities and the March of the Penitent intermission.
 -
How to handle this debuff and how it interacts with the other abilities is covered in the next three sections below.
Blood Price
Three times throughout Phase One, the boss will cast ![]() Blood Price.
Blood Price.
-
This stuns all players for 3.5 seconds and picks them up.
-
Each player then takes a low burst of shadow damage whilst dealing shadow damage to all players who have the same number of Burden of Sin stacks as them.
-
As this damage is dealt, all players are then thrown directly away from the boss.
Players should stack up next to the boss and position themselves so that they are thrown against the wall, making sure not to be thrown into any ![]() Desolation pools.
Desolation pools.
-
The raid also wants to try and have players have as different Burden of Sin stacks from each other as possible to reduce incoming raid damage.
-
This is achieved by using the Cleansing Pain ability.
Cleansing Pain
Six times throughout Phase One, the boss will cast ![]() Cleansing Pain towards the current tank.
Cleansing Pain towards the current tank.
-
This large frontal cone deals a moderate burst of shadow damage to anyone hit.
-
Players with Burden of Sin will lose 1 stack of their debuff and will spawn an Echo of Sin add.
-
Players without Burden of Sin will take 300% increased damage from the ability, likely one-shotting them.
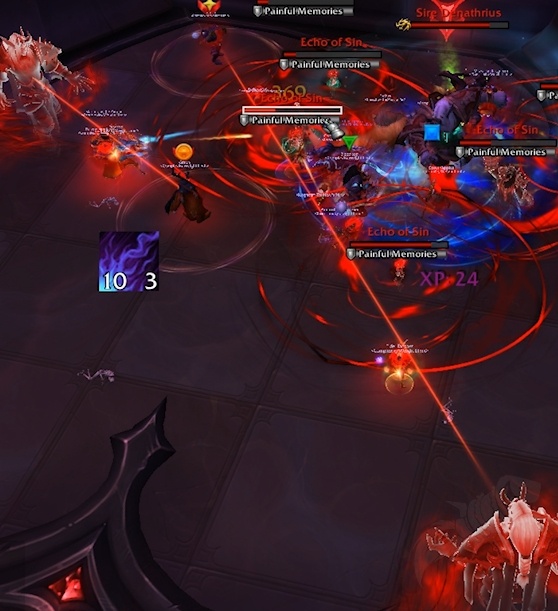
Echo of Sin adds are immobile and immune to all forms of crowd control. They simply channel moderate damage to the raid every 2 seconds with the ![]() Painful Memories cast.
Painful Memories cast.
-
Players who are removing their Burden of Sin stacks should stack right in front of the boss as to spawn the adds as close by as possible.
-
Additionally, if the boss is positioned near a wall, players can stand between the boss and the wall which helps spawn the adds even closer together.
-
As soon as the adds spawn, all DPS should switch to them and kill them off as soon as possible.
-
The combined damage of the Cleansing Pain followed up by the
 Painful Memories can deal a substantial amount of raid damage: healers should be prepared to use healing cooldowns to counter this damage.
To deal with the ![]() Cleansing Pain,
Cleansing Pain, ![]() Burden of Sin and
Burden of Sin and ![]() Blood Price mechanics, the raid should do the following:
Blood Price mechanics, the raid should do the following:
-
Split the raid into two evenly sized teams. Each team should contain one tank. The teams should take turns at soaking the Cleansing Pain.
-
Due to the way the abilities line up, this will make it so that half the raid has different stacks than the other each time Blood Price is cast which helps keep raid damage to a minimum.
-
Clearing stacks in this way also spawns Echo of Sin adds in a steady and regular rate that the raid should easily be able to keep up with.
-
This will also leave the entire raid at 1 stack of Burden of Sin at the end of the phase, which is important for the March of the Penitent intermission.
There are also additional ways that can be utilised to further reduce raid damage from ![]() Blood Price as well as make the intermission even safer.
Blood Price as well as make the intermission even safer.
-
These have been omitted for the sake of brevity and it is unlikely you will need to complicate the strategy written above on normal difficulty.
-
That being said, if you want to read about additional ways of dealing with this mechanic, this information can be found in the heroic section of the guide.
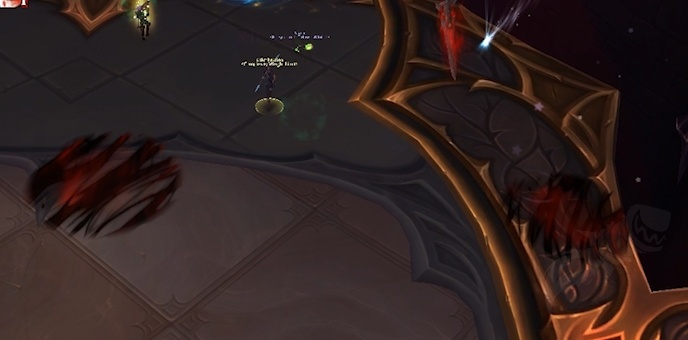
March of the Penitent: Intermission: 70% - 70% Health
Upon reaching 70% health, the boss teleport to the middle of the room, despawn all ![]() Desolation pools in room and drag all players to his location, stunning them in the process.
Desolation pools in room and drag all players to his location, stunning them in the process.
-
Moments later, the boss throws all players to the edge of the encounter space and begins to cast March of the Penitent for 15 seconds.
-
Players afflicted with Burden of Sin have their movement speed reduced by 20% per stack and are unable to use abilities.
-
Moving within 16 yards of the boss will remove all Burden of Sin stacks from the player.
-
If you fail to reach the boss before his March of the Penitent cast ends, you will be instantly killed when you enter the next phase via the
 Fall of the Unworthy.

If all went well, you just move to the boss to pass the intermission!
Players must enter this phase with a maximum of two* ![]() Burden of Sin stacks, as this allows them enough movement speed to make it to the boss in time.
Burden of Sin stacks, as this allows them enough movement speed to make it to the boss in time.
*Beta Test Note: Players with three stacks of ![]() Burden of Sin were "sometimes" able to reach the middle and cleanse their stacks, but not every time. We're currently unsure if this was intended or not.
Burden of Sin were "sometimes" able to reach the middle and cleanse their stacks, but not every time. We're currently unsure if this was intended or not.
-
As soon as you are knocked away from the boss, simply run towards him and remove your stacks, at which point you can use abilities again.
-
Classes with immunity to movement impairing effect spells can use them to counter the slow from this ability; however, they must be used before the intermission begins.
-
This allows classes such as Shamans to use
 Ghost Wolf before the intermission starts, allowing them to reach the boss more easily.
 -
Players who accidentally have high stacks of Burden of Sin can be saved by a
 Leap of Faith cast used by a priest who has already cleansed their stacks.
Once the cast ends, the boss will drag all players down into a new encounter area where Phases Two and Three will take place.
-
Players who failed to cleanse their Burden of Sin stacks will also be moved, but will die upon arrival. This allows them to be combat resurrected.
Sire Denathrius Phase Two
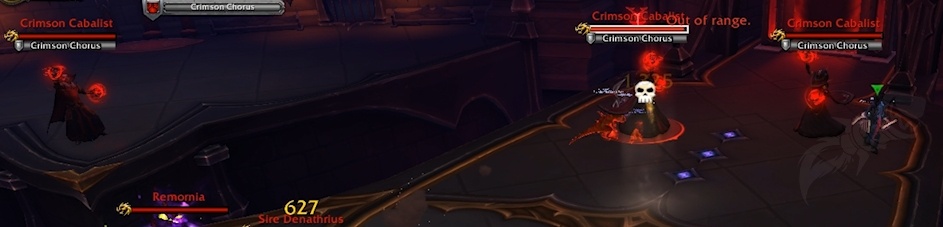
Remornia
From the beginning of Phase Two, a new add called Remornia will be active.
-
This sword has a huge health pool and is
 Bloodbound with Denathrius, causing all damage taken by the sword to also be dealt to the boss.
 -
The tanks should position the sword near the boss as often as possible as to allow DPS to cleave damage onto it.
-
This sword also has the Inevitable passive, causing it to teleport to its current tank if that tank is far away.
 Carnage
All the Remornia abilities and melee attacks apply a stack of ![]() Carnage to the players hit.
Carnage to the players hit.
-
This is a bleed debuff which deals moderate physical damage over 15 seconds and will stack.
-
When taunting, the tanks should make sure they taunt off of each other to make sure that no tank is tanking both the boss and Remornia at the same time.
-
As this is a Bleed debuff, Carnage can be removed by bleed removal abilities and spells.
Impale
Remornia will frequently cast ![]() Impale. This marks several players for 5 seconds.
Impale. This marks several players for 5 seconds.
-
The sword will then charge to each player, dealing damage and applying Carnage to anyone in its path.
-
This ability shows the charge target order by displaying an arrow on the ground which displays the swords upcoming path.
-
The raid should look to be closely stacked to the boss as much as possible, as this gives space for players with Impale to position themselves without hitting others.
-
Melee DPS should be extra careful, as Remornia will immediately deal damage as soon as it begins to charge to the first player.
Massacre
Whenever Denathrius reaches 100 energy, he will cast ![]() Command: Massacre. This cast resets his energy back to 0%.
Command: Massacre. This cast resets his energy back to 0%.
-
When the cast completes, Remornia will despawn and a series of large swords will appear around the encounter space.
-
Each sword will mark a large line attack towards the location of a random player for a few seconds before shooting down that line.
-
Any player hit by a sword will take a large amount of shadow damage.
To create as many safe spots as possible, the raid should look to loosely spread just as ![]() Massacre is cast.
Massacre is cast.
-
Each player then needs to dodge around the incoming swords for the duration of the ability.
-
Once the attack is over, Remornia will reappear at the location it despawned from.
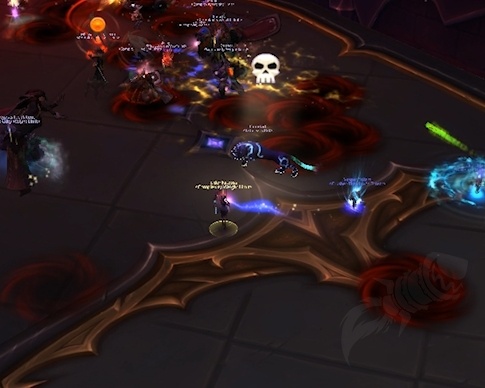
Crimson Cabalist
Crimson Cabalist adds will spawn in waves of 4 throughout Phase Two.
-
The adds will always spawn near a mirror towards the end of a path. Two will stay in the main encounter space whilst the other two will each jump to the platform flanking that path.
-
The adds do not need to be tanked and instead just channel
 Crimson Chorus, which deals low shadow damage every 2 seconds to all players. This damage stacks.
 -
The raid should look to kill these adds as quickly as possible, primarily to make sure that two sets of adds are not active at any given time.
The adds on the platforms flanking the path cannot be accessed simply by walking to them, as the platforms are inaccessible with standard movement.
-
These adds should be focused down by ranged players whilst melee players focus on killing the two adds on the main path.
-
If your raid team does not have enough ranged damage, certain melee classes can access these platforms.
-
Players with movement spells, such as
 Heroic Leap,
  Shadowstep, etc, can reach these adds, but do remember that they will also need to have a way to return to the main path.
 -
The Hand of Destruction ability can be utilised in this way, but if the adds are killed quickly, players may be stranded on the platform for some time before the spell is cast.
Wracking Pain
Every 20 seconds, Denathrius will cast ![]() Wracking Pain at his current tank.
Wracking Pain at his current tank.
-
This deals a large burst of shadow damage and applies a 30% damage taken increase for 24 seconds to all players and Cabalist adds in large frontal cone.
-
The tank should position the boss to hit the two adds on the main path with the Wracking Pain cast, whilst all other players avoid standing in this area to dodge the damage.
-
If positioned precisely, the tank can also hit one of the adds on a side platform.
-
Once the cast has complete, the tanks can taunt off of one another as to prevent any tank gaining 2 stacks of Wracking Pain at any given time.
Hand of Destruction
Every ~40 seconds, the boss will drag all players to his current location and then summon an image of himself at that location.
-
This image will explode after 6 seconds, dealing lethal shadow damage to all players. This damage falls off with distance.
-
When this is cast, players should immediately look to move as far from the boss as possible to reduce the incoming damage.
To assist in this, players can utilise the mirrors positioned at the end of each path.
-
Moving into one of these mirrors will immediately teleport you to the mirror on the opposite side of the room.
-
The tanks can position the boss next to one of these mirrors. Once all players are gripped here, they can simply move into the mirror and be as far from the image as possible.
-
As all players will be far from the boss and Remornia, they will teleport to the tanks location via Inevitable. which reduces DPS downtime on the boss.
-
If any remaining Cabalist adds are still active after the Hand of Destruction has detonated, the raid can simply re-enter the portal, teleporting them next to the adds so that they can be killed off.
Upon reaching 40% health, Phase Three will begin.
-
All Crimson Cabalist adds will jump to the centre of the main platform and channel
 Dusk Elegy, reducing incoming healing on all players by 10% per cabalist.
 -
The raid should look to kill all adds before the transition and ideally avoid pushing into Phase Three just as a new set of adds spawn.
-
Any adds that are still active should be nuked down as the highest priority.
Sire Denathrius Phase Three
Beta Test Note: Due to limited testing, information regarding all aspects of Phase Three aren't currently known. This section of the guide will be updated when this boss is encountered on live servers.
Indignation
As soon as Phase Three begins, the boss enables ![]() Indignation.
Indignation.
-
This creates a large ring of anima energy around the main platform area, coating each of the paths towards the mirrors. This also disables all mirrors.
-
Players who stand within this energy take large shadow damage every second until they leave.
-
The raid should look to position themselves towards the middle of the encounter space before the intermission as to avoid being caught in this energy at any time.
Remornia
The Remornia add despawns and is now wielded by the boss.
-
This reduces his attack speed by 25%, but increases his melee damage done by 50%. Each melee attack also applies a stack of
 Scorn to the tank.
 -
Tanks need to taunt off of one another as to keep the Scorn damage to a minimum. This is usually around the 4-6 stack mark.
Shattering Pain and Hand of Destruction
The boss should be positioned towards the edge of the safe playspace for his ![]() Shattering Pain cast.
Shattering Pain cast.
-
This cast hits the tank 3 times for moderate physical damage and then deals a moderate burst of shadow damage to the entire raid. This knocks back all players away from the boss.
-
By positioning the boss towards the edge of the room, the raid can stack next to him with their backs towards the rest of the room. This way they will be knocked into the safe space, not off the platform or into the Indignation areas.
This positioning will also help the raid deal with ![]() Hand of Destruction.
Hand of Destruction.
-
This ability functions identically to Phase Two, but the raid no longer has access to the mirrors.
-
As soon as players are gripped in, they should run as far from the boss as possible.
-
This is a good time for movement speed increasing cooldowns, as well as healing cooldowns as this ability will be dealing higher damage during this phase than in the previous due to the closer proximity to the boss.
Fatal Finesse
The boss will frequently mark several players with ![]() Fatal Finesse.
Fatal Finesse.
-
After 5 seconds, these players will deal a burst of damage to all players within 9 yards whilst applying a low damage 20 second dot.
-
Players marked by this ability should quickly place themselves away from others to keep incoming raid damage to a minimum.
Sinister Reflection
Upon reaching 100% energy, the boss will summon a ![]() Sinister Reflection in the middle of the encounter space.
Sinister Reflection in the middle of the encounter space.
-
When Massacre is cast, players need to make sure that they dodge the incoming swords whilst also making sure that they are not knocked off the platform by any other boss mechanic.
-
When Ravage is cast, the raid needs to quickly move to a new area of the encounter space that is free from any Desolation goo from previous Ravage .
![]() Ravage adds a hard enrage for this phase, as the raid needs to kill the boss before three
Ravage adds a hard enrage for this phase, as the raid needs to kill the boss before three ![]() Ravage are cast.
Ravage are cast.
-
This also progressively limits the playspace over the course of the phase, forcing players to be extra cautious regarding positioning to avoid the Desolation at all costs.
-
To ensure that the raid kills the boss before this hard enrage,
 Bloodlust and output potions should be used during this phase.
Heroic Sire Denathrius in Castle Nathria
Burden of Sin
At the beginning of the fight, all players receive 5 stacks of ![]() Burden of Sin instead of 4.
Burden of Sin instead of 4.
-
This doesn't change the strategy by a large amount; players should continue to take turns at soaking the Cleansing Pain cast to reduce their stacks to 2 before the intermission.
-
That being said, players may want to use more advanced tactics for this mechanic. Ideas on how this can be done is in the collapsible section below.
Additional Information: Burden of Sin Removal
 Night Hunter
The ![]() Feeding Time ability has been replaced by the
Feeding Time ability has been replaced by the ![]() Night Hunter ability.
Night Hunter ability.
-
Each player marked by this ability will have an image add fixated on them, indicated by a beam.
-
When the debuff times out, the adds will charge towards the player, dealing moderate damage to those along the path.
-
Upon reaching the marked player, the add deals very high physical damage to them and anyone within 4 yards, healing the boss for 150% of the damage dealt.
-
The damage dealt by this final splash damage is reduced for each player hit along the path of the add.
To reduce this damage to survivable levels, each marked player should have several players in their beam.
-
When soaking, players must avoid getting hit by two beams simultaneously, as this will deal lethal damage via
 Touch of the Night.
 -
To make sure this doesn't happen, marked players should position themselves so that their beams do not overlap with one another.
-
Additionally, players marked can use a physical damage immunity to counter the damage and healing from this ability entirely.
 Rancor
Whenever Remornia hits a player with ![]() Impale or
Impale or ![]() Massacre, a patch of
Massacre, a patch of ![]() Rancorspawns at their location for 1 minute.
Rancorspawns at their location for 1 minute.
-
Standing within a Rancor patch deals moderate shadow damage every second whilst increasing all damage taken by 50%.
 Crescendo
When a Crimson Cabalist add dies, it will spew out a volley of anima towards random players locations.
-
If players remain at these locations and are hit, they take a moderate burst of shadow damage and are knocked back.
-
All raid members should pay close attention to this, as getting hit may cause them to be knocked off the platform, or be knocked into another mechanic.
 Smoldering Ire
When ![]() Fatal Finesse debuffs time out, a
Fatal Finesse debuffs time out, a ![]() Smoldering Ire orb will spawn at that location.
Smoldering Ire orb will spawn at that location.
-
These orbs will explode after 10 seconds, dealing high shadow damage to the raid.
-
If a player stands on the location of the orb, they will take low shadow damage whilst reducing the size of the orb.
-
The smaller the orb, the lower the damage of the explosion.
Players afflicted with ![]() Fatal Finesse should position themselves within a reasonable distance of the raid so that others can assist them in soaking the
Fatal Finesse should position themselves within a reasonable distance of the raid so that others can assist them in soaking the ![]() Smoldering Ire .
Smoldering Ire .
-
When choosing this position, players need to remember that they need to be 9+ yards away from those afflicted with the initial Fatal Finesse debuff.
Mythic Sire Denathrius in Castle Nathria
Beta Test Note: This boss has not yet been tested on mythic difficulty. The information below is derived from the dungeon journal, datamining and heroic difficulty testing.
Burden of Sin
At the beginning of the fight, players receive 6 stacks of ![]() Burden of Sin, up from 5.
Burden of Sin, up from 5.
-
To reduce your stacks below 3, players will need to be hit by 4 Burden of Sin removing mechanics.
-
This is likely to be done via the new
 Collective Trauma mechanic.
Collective Trauma
Players hit by ![]() Cleansing Pain deal a burst of shadow damage to allies within 2 yards.
Cleansing Pain deal a burst of shadow damage to allies within 2 yards.
-
Players hit by this Collective Trauma damage lose an additional Burden of Sin stack and spawn an extra Echo of Sin .
-
The raid will need to balance this new way of removing Burden of Sin stacks with the extra incoming damage it deals.
 Spiteful
Echo of Sin adds despawn after 14 seconds. When this occurs the add will grant back the ![]() Burden of Sin stack to the player that spawned it.
Burden of Sin stack to the player that spawned it.
-
This forces the raid to kill the Echo of Sin adds before this point, as otherwise no benefit was gained by being hit by the mechanic that spawned the add in the first place.
Mythic Phase Two
The Nightcloak
At the beginning of Phase Two, "Denathrius calls upon some of his most trusted lieutenants".
-
There are four adds listed. It is unclear if all adds spawn at the beginning of the phase or they spawn over time.
-
All adds will spew out Crescendo volleys when they die, similar to the Crimson Cabalist adds.
-
It is unknown if Wracking Pain increases the damage taken by these adds.
Nathrian Hymns
All Nightcloak adds have a 50 yard aura which deals low damage every 2 seconds: ![]() Nathrian Hymn: Sinsear,
Nathrian Hymn: Sinsear, ![]() Nathrian Hymn: Evershade,
Nathrian Hymn: Evershade, ![]() Nathrian Hymn: Duskhollow,
Nathrian Hymn: Duskhollow, ![]() Nathrian Hymn: Gloomveil
Nathrian Hymn: Gloomveil
-
Each time this deals damage to a player, they receive a 1 minute debuff that increases damage taken from that specific add by 20%. This stacks.
-
Players may need to rotate which add they are attacking as to allow time for the debuff to expire.
-
Speculation: Due to the Nathrian Hymn mechanics, it seems likely that all four will be active at the beginning of the phase and are positioned at the end of the paths or on each of the platforms.
Add-Specific Abilities
Each add has one individual mechanic:
Lady Sinsear - ![]() Searing Censure: Every 5 seconds this add will send out missiles in all directions. If hit, a player takes a burst of shadow damage and is silenced for 6 seconds.
Searing Censure: Every 5 seconds this add will send out missiles in all directions. If hit, a player takes a burst of shadow damage and is silenced for 6 seconds.
-
Players need to dodge these missiles. If hit, the silence is listed as a magic effect that can be dispelled.
Lord Evershade - ![]() Baleful Shadows: Upon reaching 66% and 33% health, this add will summon Baleful Shadow adds.
Baleful Shadows: Upon reaching 66% and 33% health, this add will summon Baleful Shadow adds.
-
These adds will cast
 Vengeful Wail, which deals large raid damage whilst interrupting spellcasting. This cast is interruptible and looks like it needs to be kicked at all times.
Baron Duskhollow - ![]() Hollow Grasp: Whenever a player within 25 yards hits Baron Duskhollow with an attack, he grips them to his location.
Hollow Grasp: Whenever a player within 25 yards hits Baron Duskhollow with an attack, he grips them to his location.
-
If this add is positioned on a platform, this sounds like a useful tool melee players can use to get to him.
-
Players who are multidotting/cleaving at long range need to be aware that they need to stay further than 25 yards away from this boss to make sure that they are not gripped to him.
-
This ability could also be used to dodge boss mechanics, such as moving away from the Hand of Destruction.
Countess Gloomveil - ![]() Gloom Veil: This add is shrouded in an anima cloud. Players cannot target in or out of this cloud.
Gloom Veil: This add is shrouded in an anima cloud. Players cannot target in or out of this cloud.
-
This forces players to enter melee range with this add to interact with her.
-
If the add is placed on a platform, only players who can travel to the platform will be able to damage her.
Blood Price
During phase three, the boss is listed as having the ![]() Blood Price ability.
Blood Price ability.
-
As there are no Burden of Sin stacks active during this phase, this ability will be dealing extreme levels of damage.
-
It is currently unclear how players are supposed to deal with this.
-
Additionally, players need to position themselves so that they are not knocked off the platform once the ability ends.
 Through the Mirror
"As ![]() Indignation is cast, the mirrors in the room begin to warp. What awaits players who pass through a mirror during this time is known only to Denathrius himself."
Indignation is cast, the mirrors in the room begin to warp. What awaits players who pass through a mirror during this time is known only to Denathrius himself."
-
The Indignation ability is still listed as disabling mirrors on Mythic difficulty.
-
It is currently unclear what happens when you pass through a mirror during phase three.