Hungering Destroyer
Guida in italiano qua!
Cliccate su Leggi Tutto per la guida completa in inglese!
Hungering Destroyer Quick Tips in Castle Nathria
-
Tanks taunt off of each other after each
 Overwhelm, as this also helps keep
  Growing Hunger stacks low.
 -
Players with
 Gluttonous Miasma are immune to all incoming healing from player spells. They can still be shielded.
 -
At least 2-3 players should help soak a player who is afflicted with Gluttonous Miasma. This should be increased if the player needs a lot of healing in a short time.
-
Players marked by
 Volatile Ejection lines should spread to avoid hitting any player with more than one line, ideally hitting no other players with their line.
 -
Spread out away from others when the raid is afflicted with
 Expunge.
 -
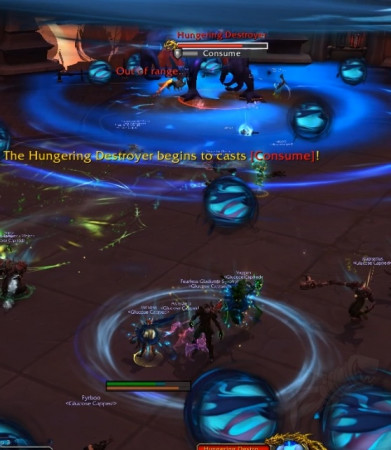
Move the boss to the edge of the room and run away from him when he casts
 Consume.
Hungering Destroyer Abilities & Strategy
Growing Hunger
Each melee attack from the boss leeches health from its target and grants the boss a stack of ![]() Growing Hunger.
Growing Hunger.
-
Growing Hunger increases the damage of this leech effect by 8% per stack and will stack indefinitely until the boss hits a new target, at which point the stacks reset.
-
To keep incoming tank damage and boss health gain as low as possible, tanks should look to taunt often to keep the boss's Growing Hunger stacks to a minimum.
-
In theory, tanks could taunt as often as they want, but this will make the boss taunt immune pretty quickly. We recommend that you taunt around the x-x stack mark.
Overwhelm
The boss will occasionally hit the tank with ![]() Overwhelm, dealing a large burst of physical damage after a short cast.
Overwhelm, dealing a large burst of physical damage after a short cast.
-
Tanks should look to have some form of damage reduction available for this hit.
-
This can be used as an opportunity to taunt swap off of one another, keeping Growing Hunger stacks low as well as ensuring that the tank who just get hit by Overwhelm doesn't die shortly afterwards.
Gluttonous Miasma
Every 24 seconds, the boss will apply ![]() Gluttonous Miasma debuffs to several random non-tank players.
Gluttonous Miasma debuffs to several random non-tank players.
-
These 24 second long debuffs deal low shadow damage every second and make the target immune to incoming healing. This immunity does not apply to shielding spells.
-
The afflicted players will leech damage from anyone within 5 yards every second. This is the only way the debuffed players can receive direct non-shield healing during the debuff.
-
This debuff cannot be removed via immunities. The only known way of losing the debuff is by letting it expire.
This mechanic is the most complicated part of the fight, as it influences all of your decisions when it comes to dealing with other boss mechanics.
-
It is important that players who have the Gluttonous Miasma have at least 2 other players nearby as this is enough players to counteract the damage from the Gluttonous Miasma debuff.
-
In order to gain health, the debuffed player will need at least 3 players to start healing at a reasonable rate. The more people that are added, the more healing they will receive.
-
We recommend that the raid is loosely spread around the encounter space. When the debuffs are applied, players can form small clumps around afflicted targets to keep them healthy.
-
If multiple debuffs are within a single clump, we recommend that one of those debuffs split off and find a new clump to join.

An alternative strategy for this mechanic is to stack up behind the boss as much as possible and simply let the debuffs splash over the majority of the raid.
-
This is far easier, however will lead to much more healing needing to be done as the raid will be taking more damage than necessary.
-
Additionally, in large raid sizes where the amount of debuffs are higher, this strategy may be detrimental, as the healers struggle to heal up 5-6 debuffs worth of damage.
-
This strategy also requires a good amount of awareness, as several abilities (such as Volatile Ejection and Expunge) require players to be spread within a short period of time, so use this at your own risk!

Stacking behind the boss with the debuffs is easy - but requires more healing and mechanic awareness!
 Desolate
20 seconds into the fight and every 1 minute from then on, the boss will cast ![]() Desolate which deals moderate unavoidable shadow damage to all players.
Desolate which deals moderate unavoidable shadow damage to all players.
-
In isolation, this isn't very dangerous; however, it is frequently used in combination with other abilities.
-
Healers need to be prepared for these overlaps to ensure that players remain as healthy as possible.
-
Players should make sure that Gluttonous Miasma targets are healthy before this damage occurs, and that they have sufficient nearby players to leech from to heal up from this damage.
Volatile Ejection
Hungering Destroyer will frequently mark 3 players with ![]() Volatile Ejection .
Volatile Ejection .
-
Moments later, each player will have a large line shot in their direction, dealing moderate shadow damage to any player in its path. This passes through the player and will only stop once it hits the wall.
-
Each player hit also gains a 24 second debuff increasing the damage from Volatile Ejection by 500%.
-
As the ability is cast every ~30 seconds, this debuff only serves to one shot any player who is hit by multiple Volatile Ejection lines simultaneously.
-
As a result, the most important aspect of this ability is to ensure that no player is hit by this mechanic twice at the same time.

To help counter this ability, we recommend that all players fan out around the boss in a large semi-circle.
-
When players begin to be marked, they need to move away from any Gluttonous Miasma clumps they may be part of and then stand still.
-
All other players need to identify quickly where these marked targets are to make sure that they are not in the line between them and the boss.
-
Melee players need to be extra aware during this time, as the only current indication that this ability is targeting a player is that they have a small arrow icon above their head, making it difficult to see from melee.
-
If a player is struggling to move from the path the ejection will take, they should instead simply take a single hit, rather than potentially moving around into a position where they may be hit by 2.
-
Note that players with Gluttonous Miasma can be targeted by this. Their clump should move away from them for the hit and then stack back on them to help them leech back the health they just lost.

Expunge
-
After 5 seconds, each player will take a moderate burst of shadow damage and will splash this damage onto any player nearby.
-
The radius of this splash damage is dependent on the players current percent health. The lower their current percent health, the larger the radius of the splash damage.
-
Healers should try and top the raid to full before this ability comes in as to reduce the movement needed to spread safely for this mechanic.
-
Likewise, clumps should do their best to top up their Gluttonous Miasma player before this cast to make sure their radius is small and to ensure that they survive the mechanic.
-
As long as all players spread out quickly upon receiving the debuff, this ability is not very dangerous as the individual damage players take isn't too high.

Spread out from one another when
The radius of the splash damage is tied to your current health!
Consume
The boss gains energy over time. After gaining full energy, he will cast ![]() Consume.
Consume.
-
This 8 second long channel leeches a high amount of health off of all players every 2 seconds whilst dragging everyone towards to boss.
-
The closer you are to the boss during this channel, the more health the boss leeches from you.
-
Before the boss gains full energy, he should be dragged to the edge of the room and all players should be ready to generate a large amount of distance between themselves and the boss.
-
During this time, players will still be afflicted with Gluttonous Miasma. It is important the nearby players stack on these debuffed targets as to ensure they survive the damage of the channel.
-
Healers should look to use at least one healing cooldown per Consume as to help counteract this incoming damage.
-
Once the boss ends his channel, you should reposition the boss back towards the centre of the room to allow players sufficient space to spread for the Expunge, Volatile Ejection and Gluttonous Miasma abilities.
Heroic Hungering Destroyer in Castle Nathria
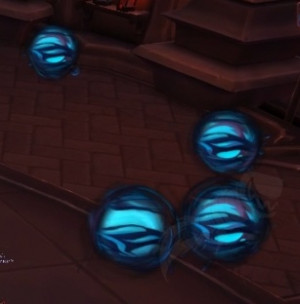
 Obliterating Rift
On heroic difficulty and above, whenever an ![]() Expunge debuff expires, an
Expunge debuff expires, an ![]() Obliterating Rift orb spawns at that location.
Obliterating Rift orb spawns at that location.
-
These orbs will remain in the encounter space until a player runs into them.
-
The orb explodes when touched, dealing a moderate burst of shadow damage and knocking back the triggering player.
-
These orbs are always the same size. They do not grow based on the current percentage health of the player afflicted with Expunge.
Since these orbs are permanent, players can deal with them in one of two ways.
The first way:
-
Players place these orbs against the walls of the encounter space as cleanly as possible, whilst leaving a gap for players to run away from the boss when he casts Consume.
-
This requires excellent coordination and positioning, as poorly placed orbs may lead to players running out of room and splashing damage onto others with their Expunge debuffs.
-
Any poorly placed orbs can always be soaked by a healthy player who is not currently helping a Gluttonous Miasma target. A good candidate for this job is the off-tank, assuming that they do not need to taunt at that time.
The second way:
-
Have the group frequently soak the orbs, either using immunities or just by having healthy players occasionally soak and orb or two.
-
This reduces the need to place the orbs perfectly, making for a simpler strategy to execute.
-
Several classes are able to soak multiple orbs without taking damage by using immunities, such as
 Blessing of Spellwarding,
  Divine Shield,
  Cloak of Shadows,
  Netherwalk,
  Aspect of the Turtle etc.
 -
The raid leader can simply ask players to soak these orbs on a rotation to keep the encounter space as clear as possible.
-
Additionally, players who are healthy after the Expunge debuffs have expired can quickly soak their own orb before returning to their position. This only works if healers are comfortable that they will be able to cover the extra damage.
Mythic Hungering Destroyer in Castle Nathria
 Essence Sap
Each tick of ![]() Gluttonous Miasma damage onto soaking players applies a stack of
Gluttonous Miasma damage onto soaking players applies a stack of ![]() Essence Sap to them.
Essence Sap to them.
-
This 20 second debuff increasing the damage taken from Gluttonous Miasma by 15%, but it does not increase the healing the Gluttonous Miasma target receives.
-
This debuff will not apply to the Gluttonous Miasma target themselves, nor does it increase the damage they take from their own debuff. They can receive the debuff if they are soaking somebody else's debuff.
-
As the Gluttonous Miasma debuffs are applied every 24 seconds, we recommend that players soak every other wave of Gluttonous Miasma debuffs, as this will allow their Essence Sap to expire between waves.
-
This requires a decent amount of improvised coordination, as the targets of Gluttonous Miasma are randomly selected each wave.
-
Healers need to be aware that soaking players will be taking every increasing damage whilst soaking and healers must be prepared to top these players before large incoming raid damage.
-
Due to this change, the "stack all debuffs in melee and out-heal it" strategy does not work on mythic difficulty.
Volatile Ejection
The amount of players targeted by an instance of ![]() Volatile Ejection is increased to 4 on mythic difficulty, up from 3.
Volatile Ejection is increased to 4 on mythic difficulty, up from 3.
-
This drastically increases the awareness and coordination needed to ensure that no player is hit by two or more Volatile Ejection hits simultaneously.
-
As a precautionary measure, we recommend that all ranged players stand on one side of the boss in a semi-circle, whilst the melee are placed on the other side.
-
This helps reduce the chance that melee players will be accidentally clipped by multiple Volatile Ejection hits at the same time.