Guida in italiano qua!
Cliccate su Leggi Tutto per la guida testuale in inglese!
Quick Tips
Phase One
-
Split the raid evenly amongst the two ships.
-
Kill both bosses within a short time period of one another.
-
When engaging Sister Katherine:
-
Move away from your allies when marked with
 Crackling Lightning
 -
Dodge the series of lightning orbs when
 Voltaic Flash is cast.
 -
Damage through the
 Electric Shroud and then interrupt the
  Storm's Empowerment cast.
-
-
When engaging Brother Joseph
-
Place the
 Sea Storm patches along the centre of the ship.
 -
Move to the opposite side of the ship when targeted by the Tempting Siren's
 Tempting Song.
 -
Kill the Tempting Siren as soon as possible.
-
Damage through the
 Tidal Shroud and then interrupt the Storm's Empowerment cast.
-
-
Use the Translocation Pedestal once both bosses are dead to reach the dock.
Phase Two
-
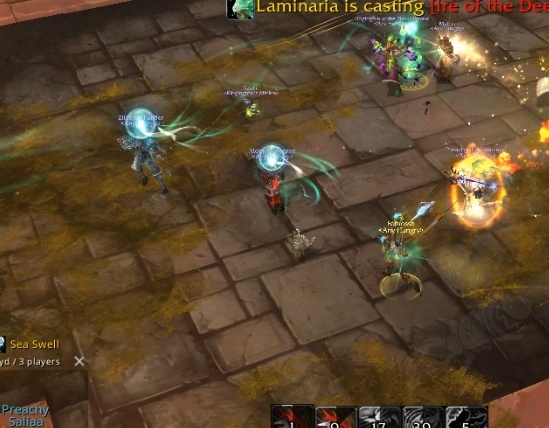
Spread 4+ yards apart when
 Sea Swell is cast to avoid splashing damage onto each other.
 -
Soak the Frozen Tidepool patches when afflicted with Storm's Wail, before letting it expire far away from the boss.
-
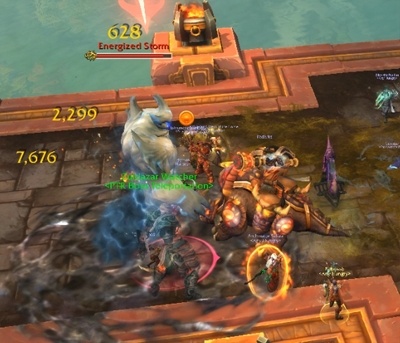
Slow and kill the Energized Storm add before it reaches the boss.
-
Have multiple players soak the
 Ire of the Deep zones.
 -
Tanks: Taunt off of one another to allow the Kelp-Wrapped debuff to expire onto an Energized Storm add.
Stormwall Blockade Abilities & Strategy
Phase One
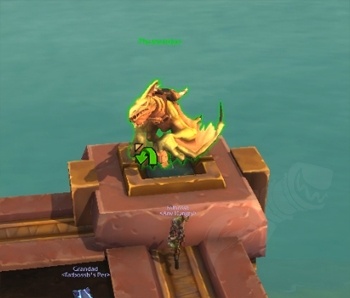
Use the Pterrordax to get to your assigned ship.
Before the encounter begins, the raid needs to split itself evenly across two ships. These ships are accessible by interacting with the Pterrordax closest to a given ship.
-
One tank, half the healers and an equal split of DPS is required per ship, as the two phase one bosses do not share a health pool and need to ideally damaged at a similar rate.
-
Players can return to the dock after taking a Pterrordax by using the Translocation Pedestal if they accidentally went to the incorrect ship. This cannot be used to return to the dock once the fight begins.
-
The encounter will not begin until players move close to, or directly attack, either of the bosses, allowing the entire raid to begin the encounter on the ships.
Laminaria Energy
Although Laminaria will not directly engage the raid during phase one, it can gain energy through the bosses ![]() Storm's Empowerment casts.
Storm's Empowerment casts.
-
If Laminaria gains 100 energy at any point of the encounter, it will cast
 Catastrophic Tides which instantly kills the entire raid.
 -
Players need to keep Laminaria's energy gain to an absolute minimum as to ensure that Catastrophic Tides is never cast.
Sister Katherine
Sister Katherine always found on the eastern ship and uses a multitude of lightning based spells to attack the raid.
 Jolting Volley
Sister Katherine will frequently cast ![]() Jolting Volley, dealing a high burst of nature damage to all players on the ship.
Jolting Volley, dealing a high burst of nature damage to all players on the ship.
-
This damage is entirely unavoidable. Healers need to quickly bring players back to healthy levels as to ensure they do not die to Katherine's other abilities.
Crackling Lightning
Katherine will occasionally apply ![]() Crackling Lightning to a random player.
Crackling Lightning to a random player.
-
This marks a player for 4 seconds. After this time, the players current location will be marked for 2 seconds, after which all players within 6 yards will take a moderate burst of nature damage.
-
As soon as this damage has occured, a Thunderous Boom will also trigger from that location, dealing high nature damage and silencing all players within 12 yards of the impact point.
-
The duration of the silence is reduced the further players are from the point of impact.
The player marked with ![]() Crackling Lightning should place it towards the edge of the ship that is populated by the least players.
Crackling Lightning should place it towards the edge of the ship that is populated by the least players.
-
All other players on this ship should move 12+ yards away from this point as to avoid the damage and silence all together.

Voltaic Flash
Katherine's most dangerous ability is ![]() Voltaic Flash.
Voltaic Flash.
-
This summons a series of lightning orbs which will appear at the edge of the ship before shooting across, dealing high nature damage to all players in their path.
-
These lightning orbs can appear in many different patterns, all of which are easily avoidable as long as players react quickly.
-
The path any given lightning orb is going to take is marked with a thin blue line. Players need to ensure that they are not within these lines, so that they can dodge the ability.
-
Players should position themselves in the middle of the ship before Voltaic Flash is cast, as this location gives the players the best chance of being able to dodge any of the incoming orbs, regardless of pattern.
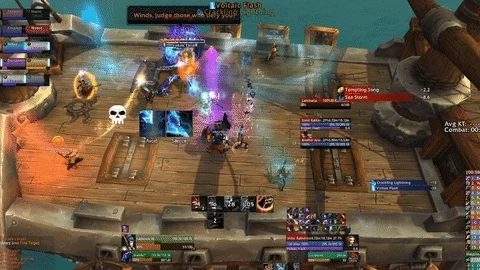
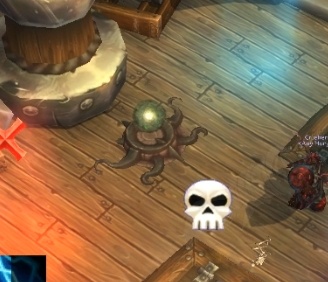
Move out of the way of the lightning orbs!
Electric Shroud
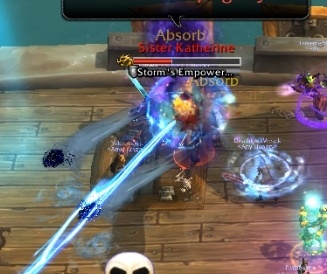
Sister Katherine will occasionally apply an ![]() Electric Shroud damage absorption shield on herself before casting
Electric Shroud damage absorption shield on herself before casting ![]() Storm's Empowerment.
Storm's Empowerment.
-
Storm's Empowerment grants 2 energy to Laminaria every 3 seconds.
-
Electric Shroud causes Sister Katherine to be immune to interrupts. Players must quickly damage through the shield to remove it, allowing them to interrupt the Storm's Empowerment cast.
-
During the Storm's Empowerment channel, Sister Katherine will not cast any other abilities.
-
If Sister Katherine is not actively engaged by the raid (i.e[li]that ship has wiped), she will constantly cast Storm's Empowerment until she is re-engaged.
Brother Joseph
Brother Joseph is always found on the western ship and uses a variety of water based spells to fight players on his ship.
 Tidal Volley
Brother Joseph will frequently cast ![]() Tidal Volley, dealing a high burst of frost damage to all players on the ship.
Tidal Volley, dealing a high burst of frost damage to all players on the ship.
-
This damage, just like Katherine's Jolting Volley, is entirely unavoidable and must simply be out-healed.
Sea Storm
Brother Joseph will occasionally mark multiple players. After a few moments, all players within 5 yards of the marked targets will take a low burst of frost damage.
-
These locations will have a Sea Storm left behind at their location, which deals low ticking frost damage and reduces player movement speed by 50% for anyone who stands within them.
-
These Sea Storms should be place along the middle of the ship, as to create a large area of Sea Storms which can be used to slow the movement speed of players afflicted with Tempting Song.

 Sea's Temptation
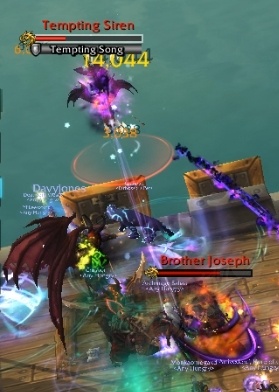
Joseph's most dangerous ability is ![]() Sea's Temptation. When cast, a Tempting Siren add will swoop down towards a random edge of the ship.
Sea's Temptation. When cast, a Tempting Siren add will swoop down towards a random edge of the ship.
-
Once it has arrived, it will mark a random non-tank player for 3 seconds and cast Tempting Song at them.
-
This causes the player to move directly towards the Tempting Siren. Upon reaching the edge of the ship, the Tempting Song afflicted player will leap off the side of the boat to their death.
The player marked with ![]() Tempting Song needs to create the largest possible distance between themselves and the Tempting Siren.
Tempting Song needs to create the largest possible distance between themselves and the Tempting Siren.
-
This path should ideally be filled with Sea Storm patches, as to slow the rate in which the player reaches the Tempting Siren.
-
Players under the Tempting Song can be gripped via a priests Leap of Faith, which can help save them in the event they nearly reach the siren.
All DPS on this ship need to focus down and kill the Tempting Siren before the player reaches it.
-
If the player does jump to their death, a new target will be selected and the cycle will continue until the add dies.
Tidal Shroud
Just like Katherine's ![]() Electric Shroud, Joseph will apply a
Electric Shroud, Joseph will apply a ![]() Tidal Shroud to himself and channel
Tidal Shroud to himself and channel ![]() Storm's Empowerment.
Storm's Empowerment.
-
Players must damage off the Tidal Shroud shield and then interrupt the Storm's Empowerment channel as soon as possible.
-
Brother Joseph will not cast any additional abilities during this time.
Soul of the Tidepriestess
When Katherine dies, her soul appears and begins channelling Greater ![]() Storm's Empowerment, granting Laminaria 5 energy every 2 seconds.
Storm's Empowerment, granting Laminaria 5 energy every 2 seconds.
-
This cast can only be interrupted by having Brother Joseph die, as this will cause her soul to disappear.
-
This mechanic works in the same way with Brother Joseph, as his soul will appear when he dies and will not despawn until Sister Katherine dies.
-
This forces the raid to kill both bosses within a short time period, as to limit the amount of energy gained by Laminaria.
If one group does kill their boss before the other, the Translocation Pedestal can be used to travel to the ship with an active boss.
-
This pedestal only activates once the boss on that ship has died.
-
Once both bosses have died, players on both ships can use their Translocation Pedestals to return to the dock and engage Laminaria directly. This is when phase two begins.
Phase Two
During phase two, the raid will regroup and fight against Laminaria directly. The encounter is complete once Laminaria has been defeated.
One player must always be in melee combat with Laminaria, as otherwise it will spam cast ![]() Reaching Attack, dealing ever increasing Frost damage to a player.
Reaching Attack, dealing ever increasing Frost damage to a player.
-
This player should always be a tank, as Laminaria's melee hits will make short work of any non-tank target.
Sea Swell
Laminaria will cast ![]() Sea Swell, creating a patch underneath each players location which will explode after a moment, dealing moderate damage to anyone nearby.
Sea Swell, creating a patch underneath each players location which will explode after a moment, dealing moderate damage to anyone nearby.
-
Additionally, a Frozen Tidepool patch is created at every players location. These pools deal moderate frost damage to any player who stands within them, every 1 second.
-
The raid should form two groups, one in melee and one in range. These groups should move as a single unit each time the Sea Swell zones appear.
-
This will keep the Frozen Tidepool patches as stacked as possible, maximising the amount of free space on the dock whilst making it easier for players to eventually clear the patches.
Storm's Wail
Laminaria will apply ![]() Storm's Wail to a random non-tank player. This 10 second debuff deals low nature damage every second and allows the player to permanently remove Frozen Tidepool patches by running over them.
Storm's Wail to a random non-tank player. This 10 second debuff deals low nature damage every second and allows the player to permanently remove Frozen Tidepool patches by running over them.
Clear as many Frozen Tidepool patches as possible!
The player afflicted by ![]() Storm's Wail should attempt to clear as many Frozen Tidepool patches as possible, before moving away from the boss as they will spawn an Energized Storm add when the debuff expires.
Storm's Wail should attempt to clear as many Frozen Tidepool patches as possible, before moving away from the boss as they will spawn an Energized Storm add when the debuff expires.
-
The Energized Storm add will not active attack the raid, instead opting to move towards Laminaria.
-
Once it reaches the boss, it will channel
 Energizing Wake, granting it 6 energy every 2 seconds. This cast can only be stopped by killing the add.
The raid must prevent the Energized Storm add from reaching the boss. This is done by spawning it far away from the boss and having DPS focus it down.
-
The Energized Storm is immune to most forms of crowd control, however slows will reduce its movement speed.
-
Upon death, the Energized Storm will apply Storm's Wail onto a new random target automatically.
-
This player should repeat the what the previous did, by clearing as many Frozen Tidepool patches before moving away from the boss to spawn the add far away.
As more and more ![]() Storm's Wail debuffs are applied throughout the fight, the raid will need to control larger and larger amounts of Energized Storm adds.
Storm's Wail debuffs are applied throughout the fight, the raid will need to control larger and larger amounts of Energized Storm adds.
-
The raid must find a balance between controlling the adds and dealing damage to Laminaria, as neglecting either task will leave the raid in a dangerous position.
-
Ideally, the adds will be killed just before they reach the boss, as this will grant the highest boss up-time whilst ensuring that Laminaria doesn't gain excess energy via the Energizing Wake channel.
 Kelp-Wrapped Fists
The bosses melee attacks each apply a stack of the magic debuff Kelp-Wrapped. This debuff deals low nature damage every second and reduces movement speed by 2%. This effect stacks.
-
Upon expiration, the tank will apply a debuff to all nearby adds and players with a 10% damage increase.
-
This damage increase can stack on non-players and it's strength will be increased for every stack of Kelp-Wrapped that expired.
-
Tanks need to taunt off of one another to keep this stack under control. This taunt swap should be timed to line up for when an Energized Storm add spawns.
-
The tank should then move next to the add and be dispelled, applying a large damage taken increase to the Energized Storm.
-
This will allow DPS to more easily kill and control the adds throughout the encounter.
Ire of the Deep
Laminaria will frequently mark a location of the encounter space. This location will explode after a few seconds, dealing heavy frost damage to the entire raid and spawning multiple ![]() Freezing Tidepool patches.
Freezing Tidepool patches.
-
If a player stands within the zone, they will take the damage instead and prevent the raid wide damage and
 Freezing Tidepool patches from spawning.
 -
The damage dealt to anyone within the zone is split between all players hit. To counter this safely, as many players should enter this zone as is reasonable for the raids size. (Usually at least one third of the total raid).
-
Each time Ire of the Deep is cast, an additional zone will appear after the previous one has exploded meaning the raid will need to soak an ever increasing amount of zones.
-
Healers need to be prepared to counter this ever increasing amount of incoming damage by staggering output and defensive cooldowns throughout the later stages of this phase.
-
The Ire of the Deep zone can be solo'd by a player using a large damage reduction or immunity. This can be used to alleviate some pressure from the raid during hectic moments.
The raid must defeat Laminaria before they become overwhelmed with ![]() Ire of the Deep zones and Energized Storm adds.
Ire of the Deep zones and Energized Storm adds.
-
Bloodlust, second potions and cooldowns should be used at the start of this phase as to make sure it ends as soon as possible.
Heroic Difficulty
 Translocate
Upon reaching 50% health, Brother Joseph or Sister Katherine will cast ![]() Translocate and teleport to the other ship.
Translocate and teleport to the other ship.
-
The raid needs to do their best to have this happen simultaneously, otherwise one ship will have to deal with two sets of boss mechanics at once.
-
Any ship that has no boss will have each players location bombarded with swirlies which each deal a moderate burst of frost damage.
-
If this situation arises, the boss-less ship should stack up and move as a unit, as the swirlies have a travel time and can be dodged as a unit.
Energized Remnant

When an Energized Storm add is defeated during phase two, a Energized Remnant orb will spawn instead of the ![]() Storm's Wail debuff being automatically placed back on a random player.
Storm's Wail debuff being automatically placed back on a random player.
-
This orb will pulse out ever increasing nature damage to the raid every 2 seconds via
 Unbound Energy until a player runs into it.
 -
Doing so will apply the Storm's Wail debuff to the player and cause the orb to despawn.
-
As soon as the Energized Storm add dies, a nearby player must pick up the orb to prevent the raid from taking any Unbound Energy damage.
Although this ability arguably makes the phase more difficult, the Energized Remnant orb allows the raid to choose who clears the ![]() Freezing Tidepool patches.
Freezing Tidepool patches.
-
Players with excellent mobility spells should be the first to pick up the orb, as they will be able to clear the largest amount of the Freezing Tidepool patches.
An alternative strategy that guilds with confident healers can use is to leave the Energized Remnant orb on the ground for a while.
-
This allows DPS to have a break from attacking adds, allowing for periods of focused boss damage.
-
If the group decides to use this strategy, they must be prepared to use healing cooldowns when the raid is starting to take excessive damage, as well as be ready to pick up the orb before it deals unsustainable damage to the raid (around the 14th damage tick).